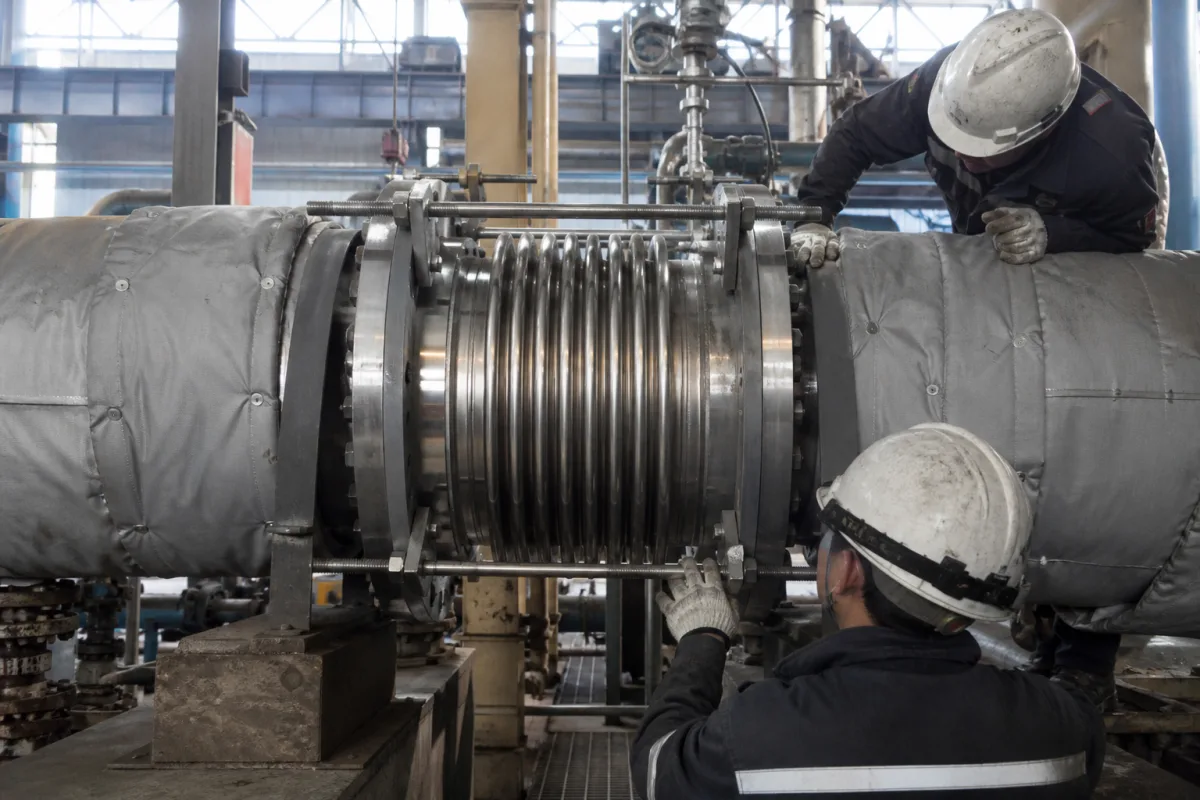
Thermal expansion joint on an insulated steam main: pre-setting the bellows for the installation temperature, and the order of fitting, testing, draining and insulating
Steam and hot-water mains · fitting an axial metal bellows between insulated pipe runs: how far to pre-stretch it for the temperature on installation day, when the shipping bars come off, and what has to happen between hydrotest and the first hot start
A steam main is assembled cold and runs hot, so the bellows that absorbs its growth is bought for a movement worked out between two temperatures, not for the day it is bolted in. Whether it lasts depends as much on the fitter as on the designer: the bellows has to go in at the length that matches the temperature of the pipe at that moment, the restraints that held it in transit must stay on until the joint is fixed and come off before pressure goes in, and water left in the convolutions after the hydrotest or chlorides in the lagging can ruin it before the line ever reaches temperature.
Axial metal bellows expansion joints fitted in insulated steam, condensate and hot-water lines, seen from installation and commissioning: thermal growth of the run between anchors, pre-set (preload) for the installation temperature, shipping and pretensioning devices, flange alignment, the guides and anchors needed before the pressure test, draining the convolutions after hydrotest, and insulating over the bellows. Choosing between metal, rubber, PTFE and fabric joints, calculating pressure thrust and placing main and intermediate anchors are covered on the Expansion joint page. Pipe bends, loops and sliding joints are mentioned only where they bear on the bellows.
CNFX editorial research · Sources checked October 13, 2026 · 4 sources
How far to pre-stretch an axial bellows for the pipe temperature on installation day
Spirax Sarco's steam distribution tutorial reads about 330 mm of growth from its chart for 100 m of carbon steel pipe heated through 250 °C (15 °C to 265 °C). [1] Witzenmann's installation instructions preload axial expansion joints after installation, where necessary and agreed with Witzenmann, by 50 % of the total movement, taking into account the direction of movement and the temperature during installation. [2] The table carries Spirax Sarco's own 30 m, 4 bar g example through that rule.
Spirax Sarco describes the same idea for plain pipe as cold draw: the run is left short by half the expansion and pulled up cold, so the pipe is stressed from −½ to +½ of the force rather than from 0 to the full force. [1] The bellows preload follows the same split, but the joint maker sets the figure. Macoga instructs fitters to install at neutral length unless Macoga specifically indicates a preset, and not to stretch or compress a joint to take up pipe-length defects or misalignment unless the design allowed for it. [3][4] Witzenmann permits compensating assembly tolerances by deflecting the joint only after consultation. [2]
Spirax Sarco's preference order for the movement a bellows takes is axial, then angular, then lateral, and it recommends avoiding angular and lateral movement wherever possible; it notes that limit rods act as tie rods if an anchor fails, containing the pressure thrust. [1]
Step
Input from the source
Editorial calculation
Growth per metre per °C implied by the chart reading
15 °C of the swing already used: extend about 30 × 56 × 0.0132 ≈ 22 mm instead of 28 mm
Ask the joint supplier for the installed length (or preset) as a table against installation temperature, with the minimum and maximum line temperatures it is based on, and whether the preset is applied in the factory with pretensioning brackets or on site after the joint is fixed.
02
Shipping bars, guides, hydrotest, draining and lagging: the order on a steam line
The two makers' instructions put the critical steps in a fixed order. The restraints painted or marked for transport hold the bellows at its set length and must not come off before the joint is installed; the pressure test waits for the guides and anchors.
Editorial calculation from Witzenmann's Fig. 3 limits: on a DN 200 line, L1 is under 0.8 m and L2 under 2.8 m. [2] Spirax Sarco adds that on straight runs longer than 15 m, where movement is appreciable, the pipe supports should be roller type, with a saddle bolted to a bracket at not more than 6 m intervals to keep the pipe aligned. [1]
Witzenmann also notes that even a restrained expansion joint lengthens or shortens slightly under pressure thrust, and that the factory settings of tie-rod nuts must not be changed on site. [2]
Stage
What the instructions require
Lifting and fitting
Lift by the designated lugs or end fittings only, never by the bellows, shipping bars, tie rods or hinges; flanges must meet the joint without forcing; do not rotate one end to line up bolt holes, since an ordinary bellows cannot take torsion [3][4]
Flow direction
Install with the arrow or internal sleeve matching the flow [3]
Welding near the joint
Cover the bellows against spatter; never let it carry welding current or serve as an earth [3][2]
Guides
Guides both sides of an axial joint; Witzenmann's Fig. 3 marks the guide spacings L1 < 4 DN and L2 < 14 DN; only one axial joint between two fixed points [2]
Shipping devices
Remove all shipping and pretensioning devices after installation and before the pressure test of the installed system; and do not use shipping bars to hold thrust in a test made before installation [4][2]
Pressure test
Not before all guides and anchors are in (pipe hangers are not guides); never exceed the permissible test pressure; clean low-chloride water [4][3]
After the test
Drain and dry: liquid left in the corrugations can cause corrosion, or steam explosions when temperature is raised quickly [2][3]
Insulation
Before lagging with mineral wool, cover the bellows all round with sheet metal; no insulation containing corrosive substances [2]
In service
Inspect at least once a year for corrosion, deformation, leaks or loose hardware, and check anchors, guides and tie rods [3]
Put the hydrotest pressure the joint is rated for, the drain-and-dry step and the bellows cover sheet into the installation method statement, and have the fitter record the installed length and the pipe temperature at the time it was set.
03
Line data for a steam-main expansion joint
Paste it into your enquiry below or into an email to a maker, then replace every bracket.
Line: [DN; steam pressure bar g; saturation or superheat temperature]
Run: [length between anchors; pipe material; minimum and installation temperatures]
Movement: [axial growth mm; any lateral or angular component]
Pre-set: [factory or site; installed length vs installation temperature table]
Test: [hydrotest pressure; tested with or without restraints]
Installation: [flanged or weld ends; flow sleeve; insulation type and cover sheet]
Explore company information and manufacturing capabilities, then discuss the scope of your project with a relevant supplier.
Share this page
Compiled and source-reviewed by the CNFX editorial team.
Each manufacturer above links to the page on that company's own website where the product is listed, with the date we checked it. How we source and review
· Page last updated 13 October 2026
Buyer questions
How much should a bellows be pre-stretched before a steam line heats up?
Witzenmann's instructions preload axial expansion joints, where needed and agreed with Witzenmann, by 50 % of total movement, adjusted for direction of movement and installation temperature. Macoga installs at neutral length unless it specifies a preset. [2][3]
When are the shipping bars removed?
After the joint is installed and before the pressure test of the installed system. Macoga and Witzenmann both say not before installation, and Macoga says not to use them to hold thrust if the joint is tested before installation. [4][2]
Why drain the bellows after the hydrotest?
Witzenmann warns that liquid left in the corrugations can cause corrosion, or steam explosions when the temperature is raised quickly. [2]
How much does a steel steam main grow?
Spirax Sarco's chart gives about 330 mm for 100 m of carbon steel pipe heated from 15 °C to 265 °C. [1]
Sources and what still needs a direct check
Sources checked 2026-10-13. Witzenmann's and Macoga's installation instructions for metal expansion joints give the fitting, preset and test sequence; Spirax Sarco's steam distribution tutorial gives the pipe growth and cold-draw method.